Posted on 06/01/2009. By Pete Otaqui.
If you have just bought your first DSLR it can be a little daunting at first – there are so many controls, options and settings that really don’t mean very much. I think one of the best ways to get yourself going is ot have some firm project ideas in mind, especially things that would be difficult or impossible with a compact camera. Although I’ll generally be discussing technical ideas, hopefully some of them that might spark your own imagination with ideas for a story you want to tell with an image.
Kit
- Lens filter (UV or possibly “skylight”) – a UV or skylight filter will help a bit with outdoor photography, but you will want to get one and leave it on your lens all the time to protect it from dust and scratches. Filters are glass rings that screw on to the end of your lens, and can do all sorts of different things – see for example this Camera Filters website (actually a lot of the warm / cool / soft focus / cross filters offer images you could replicate with software.
- Photoshop – this is an expensive piece of software, but is the absolute industry-standard photo-manipulator. You might want to leave off getting this, and use an online service like Picnik for basic colour correction / cropping and the like. If you do want to get Photoshop you can definitely look into buying an older version to save yourself a lot of money (on EBay for example) without really losing much in terms of functionality.
- Tripod – this is more-or-less a requirement since you’re unlikely to find something else handy that you can just sit the camera on for long periods of time, in low light, and many other situations. Tripods are a pain to carry around and difficult to find a place for, but they do give you much more creative freedom. There are some interesting products like the GorillaPod which you might think about.
- Remote control – either wired or wireless, your camera will almost certainly have some kind of remote control capability. It used to be easy in the old days, when almost all cameras had a standard fitting, but you can usually buy fairly cheap, unbranded wired remotes for models that have a connector. It’s worth trying a shot without one, but even at exposures of 1/8 of a second the shake from pressing the button can ruin a photograph.
Long Exposure
You’ve probably seen long-exposure photographs, one of the most common types is of streaming traffic lights along road networks. This kind of photography is pretty easy and quite fun.
Setting up your camera on the tripod is fairly straightforward, and you should refer to the manual for your camera on how to set it up for long exposure. By default this will expose for as long as you hold down the button, if you are using a remote it should have a “lock” so you can just leave it in the “exposed” position (ooh err) and go have a cup of tea.
Set Up and Settings
Ideally you should have a low ISO number set, as this will give better results. “ISO” is a term from the film days and refers to how much light the film needs for a good exposure, with higher numbers needing less light (you may even remember 100 speed film for daylight, and 400 speed for indoors). The faster the film, the more “grainy” the image will appear. Your DSLR probably goes from ISO 64 or 100 up to 1600 (or even 3200). You can step up the ISO if you have to, which will let you shorten the exposure time.
You’ll probably need to experiment with setting the “aperture” and how long the exposure lasts. Start out with narrow aperture (f16 or higher) and a short-ish exposure (5 minutes). If everything comes out black, then try opening up the lens (a lower f number) and, if the shot you want permits it, lengthening the exposure. Some shots you want may require you to have a specific length of shot (for example, the stars moving) so work around any single “fixed point” that you require.
Besides the “traffic” idea for a long exposure shot, you might also consider a river (flowing water turns all smooth and blurry with a long exposure) or even, if you’re in an area with a clear view of the night sky, the stars themselves:

This shot was taken over about 40 minutes, pointing up, and shows the movement of the stars visible because the earth’s rotation. Kind of cool really :)
Impossible Focus
Auto focus is great much of the time, but there are plenty of photographs you might want to take where it just won’t work. For example, looking through some trees at the person you’re stalking … uh, I mean “the person modelling for you” … is almost impossible for auto-focus, which will inevitably focus on the greenery.
There are no special kit requirements for this, and you will simply need to set either the camera, or the lens into “Manual Focus” mode (which are both probably physical switches near each other where the lens meets the body).
Now, as well as “zooming” (assuming your lens does that, which it almost certainly does) you can use the other “ring” on the lens to manually focus. It takes a little getting used to to do this properly, and if you’re camera has a “Live Preview” mode, this is the point to leave it behind and look through the viewfinder (since it’s going to be bascially impossible to tell from the digital screen what is in focus).
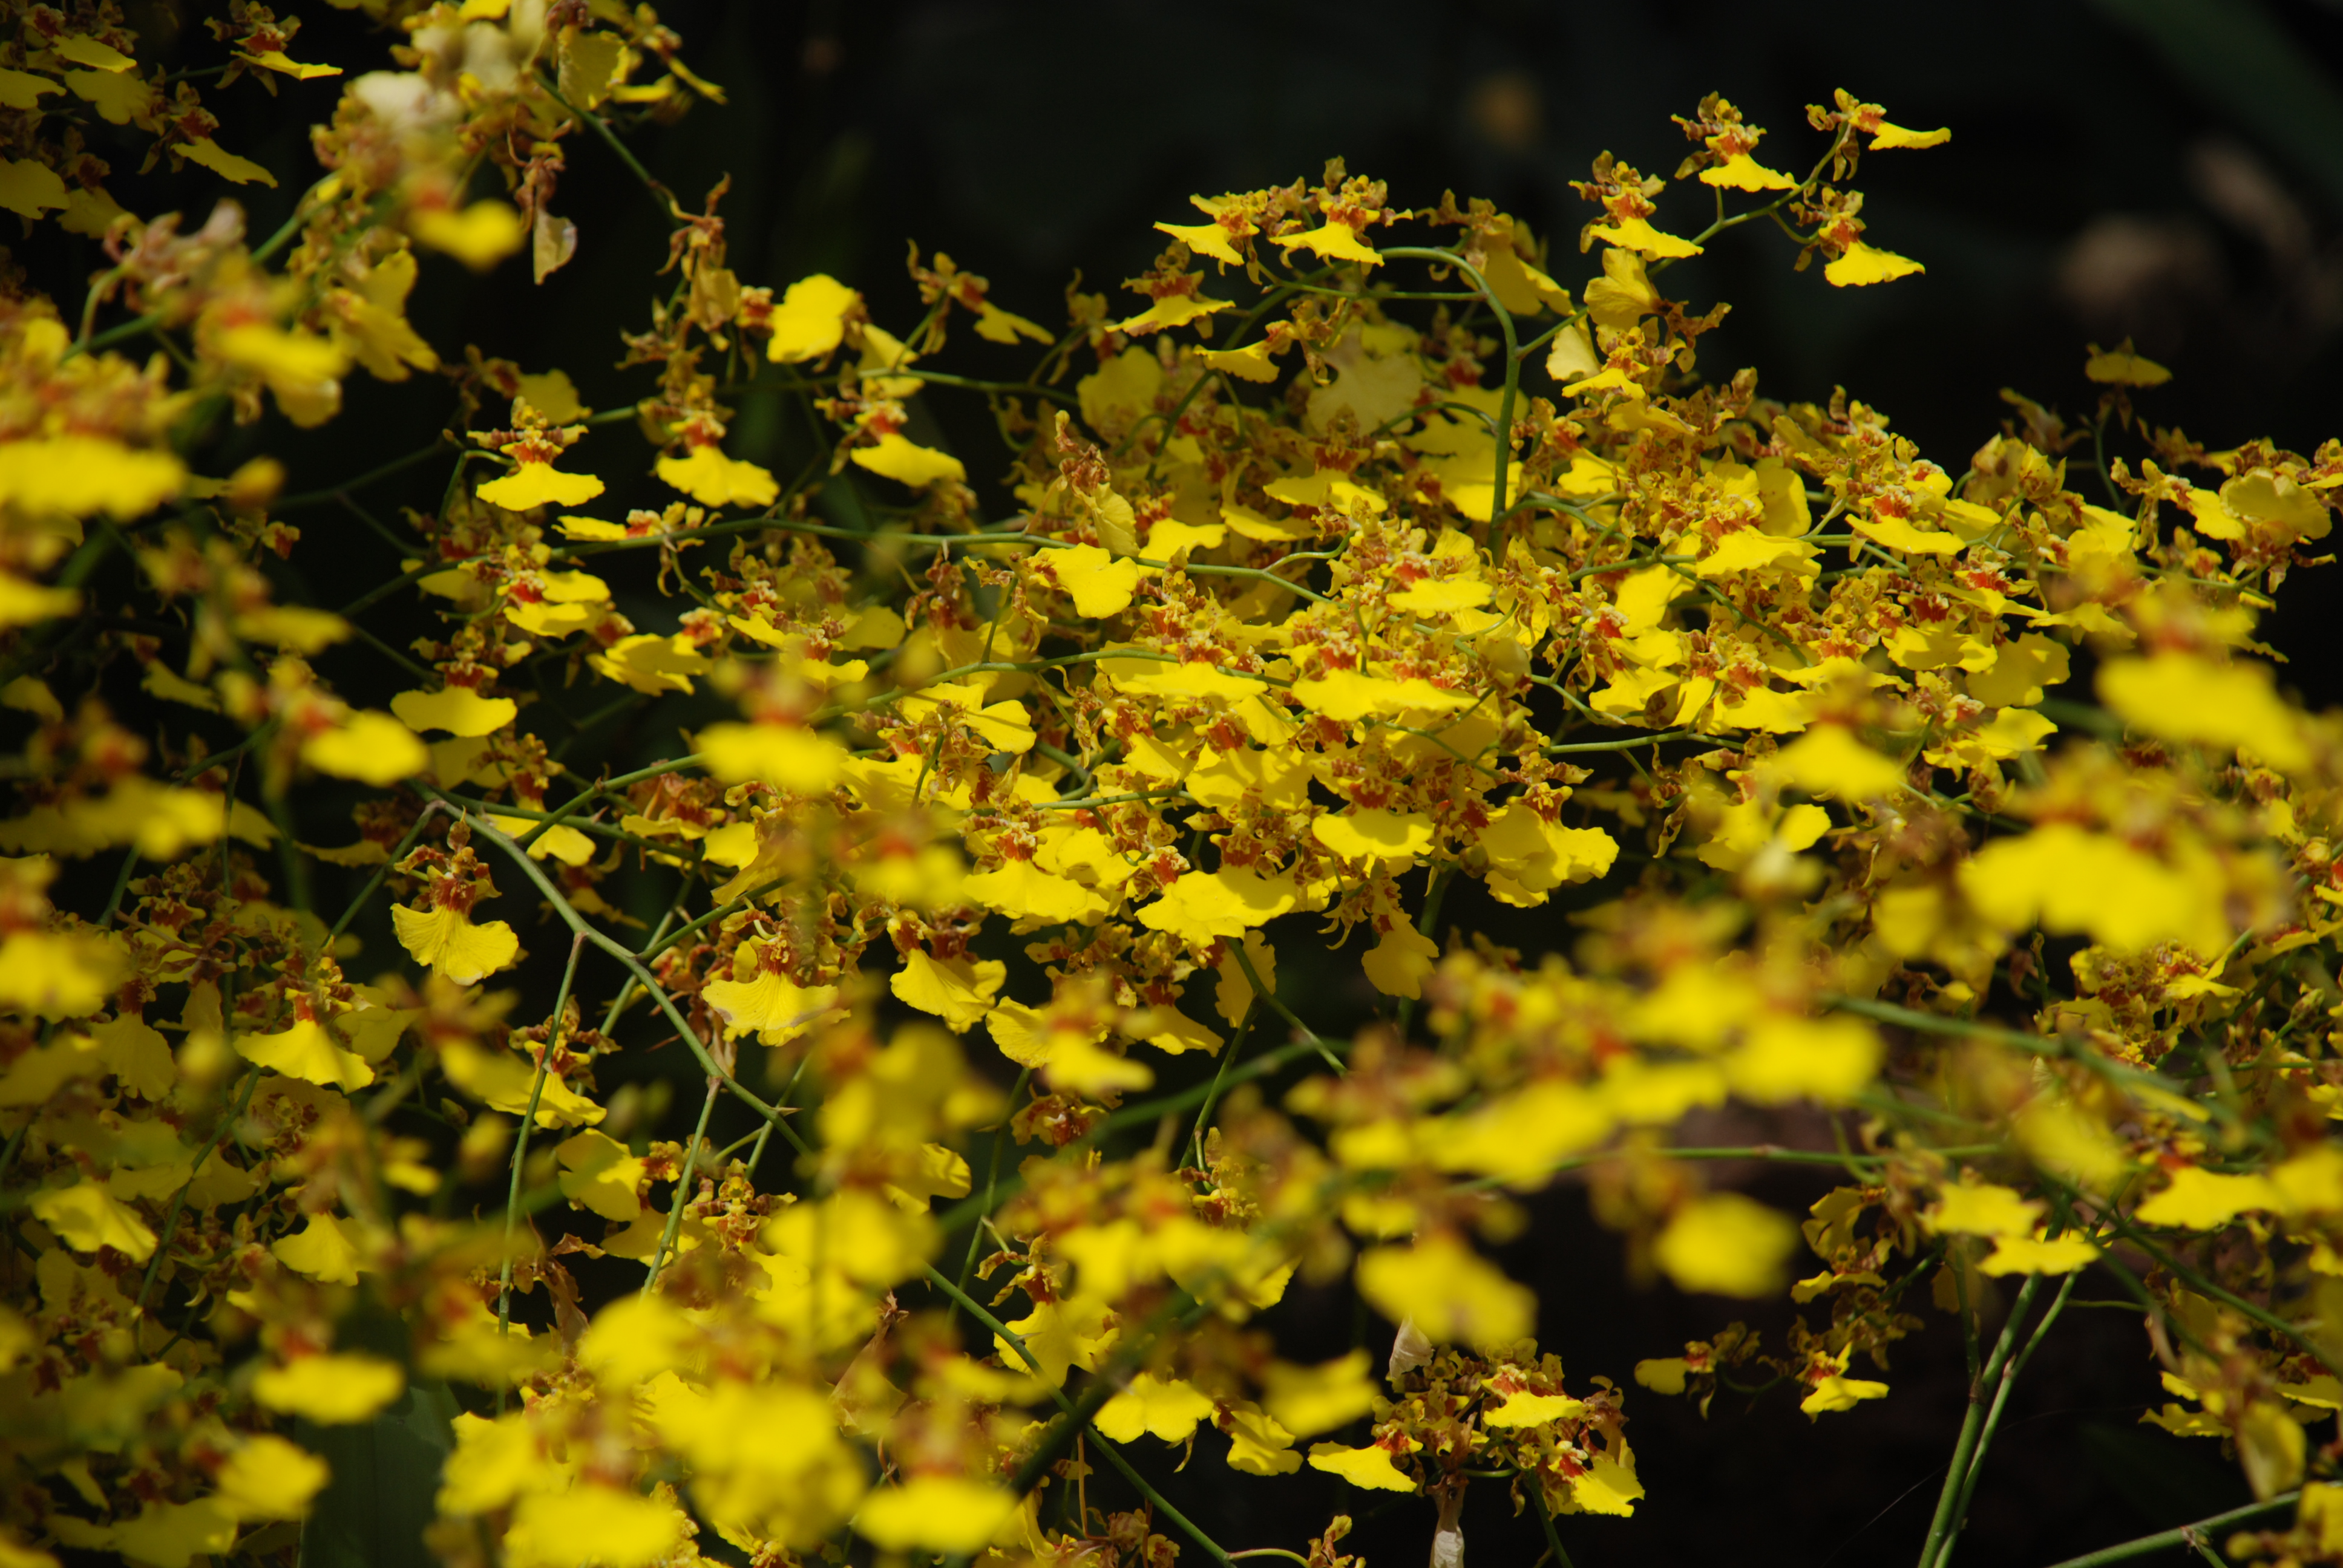
Here’s a floral example from Singapore’s Botanical Gardens. Using autofocus would have honed in on the foremost flowers, whereas I thought making the central ones appear crisp, and having some blur in the foreground and background would look more interesting
The Hichcock Cameo
“The camera never lies,” or so the saying goes. In fact, the camera *always* lies – a photograph is a 2-dimensional representation of a 3 (or 4 if you include time) dimensional event, and by definition is manipulated and shot from a particular perspective.
You don’t have to be in a studio to manipulate the scene you want to shoot. Careful positioning of yourself, or other objects and props can add a lot to an image. Look at this picture, which is striking immediately, but also includes an image of my friend Ben, who was doing the shooting:

This is a relatively obvious example, but you could place a mirror in a scene, angled just right to show yourself.
I know I said I would only be discussing technical ideas rather than creative ones and I think getting your head around the idea of controlling your shot and its environment counts, just about.
Multiple Exposures
You can of course get a multiple exposure effect using software, but it’s quite a lot of fun to do it directly on the camera, and certainly can help you avoid getting bogged down in endless photoshop tweaking.
I don’t have any examples to hand, but a quick search for multiple exposure on Flickr gives plenty of results.
One of my all time favourite multiple exposures was made (in the days before digital) by Albert Watson for a portrait of Mick Jagger. the photographer superimposed a leopard’s face onto Mick’s, with fantastic results:

Portrait of Mick Jagger by Albert Watson
Stop Frame Animation
This is a fairly straightforward technique, and could in fact be done with any camera at all. Set up your camera on a tripod and point it at your scene. Snap, move your subject a tiny bit, snap again.
Given that you will probably be working at (at least ) 12 frames per second you would be well advised to dramatically lower the image resolution – something like 800 x 600 (or whatever your camera’s “low quality” setting is) should be fine for video.
You’ll need some kind of software to stitch these images together into an actual movie. Drop me a comment if you need some suggestion.
General Techniques
To get the best of many of the kinds of shot I’ve listed here, it will be well worth your time getting your head around some of the more technical aspects of photograpy.
Aperture and Shutter Priority
Your camera will have various “scene modes” such as “Sport”, “Portrait” and “Landscape” which are usually very well set up for their respective environments. You will benefit from understanding what their doing in the background, and simply mimicing them with the more manual modes your camera offers is a great start.
Aperture priority lets you adjust how wide open the lens is (the “f stop”, or how much light it lets in) while the camera automatically adjusts the shutter speed for a correct exposure. Shutter priority is the opposite – it lets you adjust the shutter speed while opening or closing the lens accordingly.
A very open lens with a low f stop setting (1.4 to 4) will narrow the “depth of field” or amount of things that will be in focus. Look, for example, at the “Impossible Focus” shot of flowers above – only a small area (I’m talking in terms of distance from the camera rather than surface area of the picture) is in focus. Contrast this with a landscape shot, where you will almost certainly want a large depth of field (achieved by having a high f stop of f16 or more) and everything from a nearby tree to the mountain in the distance to appear crisp.
Shutter priority lets you control the shutter speed – the amount of time the lens is actually open. If you are taking a shot of a hummingbird you will probably want a very fast shutter speed, otherwise you will only see a blur. If you want a very dramatic shot of a runner, you might want to slow the shutter down so you get some motion blur (something like 1/15 of a second).
The modes mentioned above will work out something like this in manual terms:
- Sport will have as fast a shutter speed as possible to stop any motion blur of fast moving subjects.
- Portrait will have as low an f stop (as “wide open” a lens) as possible, so that only the subject is crisply focused.
- Landscape will have as high an f stop as possible, so that as much as possible is in focus.
AE and AF “Locking”
AE (Auto Exposure) and AF (Auto Focus) “Locking”, and also a combination of the two, are fantastic things to understand and use as they give much greater freedom over how your picture is framed, while still being in control of how it is focused. I’ll assume that you are using locking on both AE and AF at the same time, but bear in mind that you can just do one at a time.
If you want to take a picture where the subject is not central in the frame, it can be difficult to get your camera to focus in the right place, or even if you are using manual focus, the picture may end up being exposed for a dark background rather than the well lit, but off centre, foreground that you wanted. AE / AF Locking is the answer, and here’s what you do:
Point you camera directly at teh actual subject of your picure, and half-press the exposure button – this will set the focus and exposure. Now press the AE / AF Lock button and keep it held down. You are now free to move the camera about and point it at anything – and the focus and exposure will remain as they were when you began the lock.
Bracketing
As you experiment in more manual control over your camera, you will inevitably find shots that weren’t exposed correctly. In many situations you can just try again, but if the shot was a “one off” then sometimes you just have to write it off to experience.
Bracketing can help you here, as what it does is take a series of shots (either 3 or 5) as quickly as possible after each other with slightly different settings – both under and over exposed. In the case of 3-shot bracketing, you will get one shot exposed as the camera thinks is “correct” and then one underexposed and another overexposed – fairly obviously 5-shot bracketing is the same, but with two steps of under- and over-exposure.
Bracketed shots can also be used not only in case of problems, but also to create “high dynamic range” images. These are really interesting images where more detail is brought out from the shadows and well-lit parts of a photograph than is possible with a single exposure. You’ll need to find some software to create HDR images for you though.
That’s a Wrap!
Well that was another mammoth post! Hopefully it’s got your creative juices bubbling!