Posted on 28/10/2012. By Pete Otaqui.
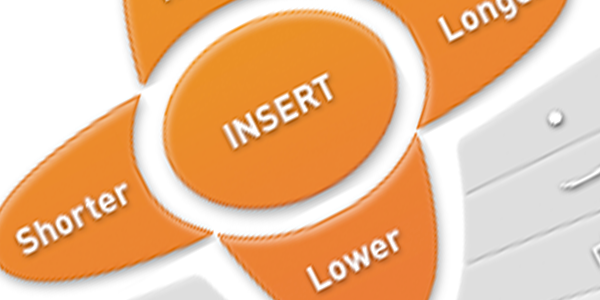
There are lots of very nice solutions for well-styled, good looking buttons out there. However, aside from some rounding at the corners, they are almost all essentially rectangular. If you are asked to build non-rectangular buttons, with “correct” hit areas, button states (enabled, disabled, toggled-on) and mouse reactivity (mouseover, mousedown) what are you going to do?
(tl;dr: you can see a live demo of irregular buttons over on JSBin
In my case, I was given a set of “buttons” of very arbitrary shapes – barely a rectangle in sight. The source was created in Photoshop rather than Illustrator, so a direct translation to something like svg looked fairly tricky, and I was loathe to implement a canvas-based solution for something as simple as some buttons.
I decided instead to use achieve the goal with two sets of HTML and some javascript plumbing. The first part, the visual display of the buttons, I made simply using a sprite sheet set as backgrounds on a series of div elements, one per button. Clearly, the divs are rectangular (the sprite images were transparent around their edges) so they couldn’t be used as the “hit” area of the irregularly-shaped buttons. That’s where the second bit of HTML came in – an overlaid image tag and associated imagemap.
I’d like to point out that, although I have used it for nothing else for the best part of a decade, Dreamweaver still offers the best tools that I’ve come across for creating imagemaps.
Here’s some example HTML we might end up with to demonstrate the structure:
<div class="controls">
  <div class="sprites">
    <div class="sprite insert"></div>
    <div class="sprite higher"></div>
    <div class="sprite lower"></div>
  </div>
  <div class="overlay">
    <img class="overlay" usemap="#button-map" src="transparent_1x1_shim.png />
    <map name="button-map">
      <area shape="poly" href="#insert" class="insert" coords="1,2,3,4,5,6....." />
      <area shape="poly" href="#higher" class="higher" coords="1,2,3,4,5,6....." />
      <area shape="poly" href="#lower" class="lower" coords="1,2,3,4,5,6....." />
    </map>
  </div>
</div><!-- .controls -->
And also some appropriate CSS to place the “layers” correctly, with the transparent image on top, and the visible sprites in the background.
.controls {
  position: relative;
  width: 200px;
  height: 200px;
}
.sprites {
  position:absolute;
  left: 0px;
  top: 0px;
  width: 200px;
  height: 200px;
}
.overlay {
  position:absolute;
  left: 0px;
  top: 0px;
  width: 200px;
  height: 200px;
  z-index: 2;
}
/* and you also need the correct css for the sprites */
The project was being built on top of Backbone, so at least I could have a single collection of model for the buttons, and two different views bound to those models, using the model properties to wire up the two disparate bits of the DOM.
I decided to use the Marionette Backbone plugin, which gives you excellent things like Collection and Composite Views, perfect for this task. Firstly, here’s how I made the Button model and Buttons Collection:
  var Button = Backbone.Model.extend({
    defaults: {
      name: 'default',
      mouse_state: 'off',
      shape: 'rect',
      coords: '0,0,20,20'
    }
  });
  var Buttons = Backbone.Collection.extend({
    model: Button,
    createAll: function() {
      var list = [{
        name: 'insert',
        shape: 'poly',
        coords: '10,10,20,0,30,10,40,20,30,30,20,40'
      }, {
        name: 'higher',
        shape: 'poly',
        coords: '110,10,120,0,130,10,140,20,130,30,120,40'
      }, {
        name: 'lower',
        shape: 'poly',
        coords: '110,110,120,100,130,110,140,120,130,130,120,140'
      }],
        buttons = this;
      list.forEach(function(props) {
        buttons.add(props);
      });
    }
  });
This is pretty straightforward – we have a collection of models. The collection contains a shortcut method to create the set of buttons we have the prerequisite css and image resources for. That’s not very elegant, since the model has clear dependencies on css and images. We could try and manage these with an AMD loader like RequireJS, but that (especially the image part) is out of the scope of this article. Maybe we should go the Java route, and just have vast amounts of XML (which is like violence – if it’s not working, you’re not using enough of it ;).
Next we can create two CompositeViews, and two ItemViews .
/* Assumes the following templates in the HTML:
<script type="text/html" id="template-empty"> </script>
<script type="text/html" id="template-image-and-map">
<img usemap="#imagemap" style="width:200px; height:200px" src="shim.png" />
<map name="imagemap"></map>
</script>
*/
/* SpriteView only _reacts_ to changes in the Model, it never sets anything there */
var SpriteView = Marionette.ItemView.extend({
template: '#template-empty',
// empty, we just want a single tag
modelEvents: {
'change:mouse_state': 'changeMouseState'
},
initialize: function() {
// add initial classes to the created element
$(this.el).addClass('sprite ' + this.model.get('name') + ' ' + this.model.get('mouse_state'));
},
changeMouseState: function() {
$(this.el).removeClass('mouseover mouseout mousedown mouseup').addClass(this.model.get('mouse_state'));
}
});
var SpritesView = Marionette.CompositeView.extend({
itemView: SpriteView,
template: '#template-empty'
});
// The 'areas' in the 'map' actual set things on the model,
// rather than reacting to changes in it
var AreaView = Marionette.ItemView.extend({
template: '#template-empty',
// empty, we just want a single tag
tagName: 'area',
events: {
mouseover: 'mouseevent',
mouseout: 'mouseevent',
mousedown: 'mouseevent',
mouseup: 'mouseevent',
click: 'clickevent'
},
initialize: function() {
var name = this.model.get('name');
$(this.el).attr({
href: '#',
title: name,
shape: this.model.get('shape'),
coords: this.model.get('coords')
});
},
mouseevent: function(event) {
this.model.set('mouse_state', event.type);
},
clickevent: function(event) {
// Assumes you're using a Marionette App and it's &amp;quot;vent&amp;quot;.
App.vent.trigger('click', this.model.get('name'));
return false;
}
});
var ImageAndMap = Marionette.CompositeView.extend({
template: '#template-image-and-map',
itemView: AreaView,
itemViewContainer: 'map'
});
// The 'areas' in the 'map' actually set things on the model,
// rather than reacting to changes in it
var AreaView = Marionette.ItemView.extend({
template: '#template-empty', // empty, we just want a single tag
tagName: 'area',
events: {
mouseover: 'mouseevent',
mouseout: 'mouseevent',
mousedown: 'mouseevent',
click: 'clickevent'
},
mouseevent: function(event) {
this.model.set('mouse_state', event.type);
}),
clickevent: function(event) {
// Assumes you're using a Marionette App and it's 'vent'.
App.vent.trigger('click', this.model.get('name'));
})
});
var ImageAndMap = Marionette.CompositeView.extend({
template: '#template-image-and-map',
itemView: AreaView,
itemViewContainer: 'map'
});
The very last piece is to add some code to actually “run” the application, which is fairly easy with Marionette:
  // make an App
  var App = new Marionette.Application();
  // add some regions for automatic dom insertion
  App.addRegions({
    sprites: '#sprites',
    overlay: '#overlay'
  });
  // create the default collection
  var buttons = new Buttons();
  buttons.createAll();
  // show the views - the magic here is in using two views of the same data
  App.sprites.show(new SpritesView({collection:buttons}));
  App.overlay.show(new ImageAndMap({collection:buttons}));
  App.vent.on('click', function(name) {
    console.log('You clicked: '+name);
  })
  App.start();
This is fairly easy to setup and get running, at least to see the classnames of the sprite divs changing as you interact with the image map areas. Once you’ve got your sprite sheet and CSS setup, it’s a lot more tactile.
You can see a running example over on jsbin: Non-rectangular buttons with css and javascript .
Please do note that it’s not “perfect” – there are UX interactions that aren’t implemented. It’s very worth noting that as soon as you step away from built-in controls for things like buttons, you’re either going to lose some functionality and / or give yourself loads of headaches trying to deal with a lot of edge cases. What about when someone drags something over a button? Clicks down on one, but lifts up on another? Uses your app with a touch interface? The list goes on a long way, and I would always try and talk a client out of making this choice. If they are adamant, or the reason for doing is simply “good enough” then this at least is a good way to go.
If there aren’t already, there should soon be, reasonable libraries built on top of canvas to give you the ability to have irregularly shaped interactive, clickable elements.